Mushroom and Lichen Dyes

As long as I can remember, mushrooms and lichens enchanted me. They looked otherwordly and alien among the forest and fields. The past few years I’ve taken my interest in fungi and lichens by photographing and IDing ones I find on my hikes and walks. Mostly out of curiousity and wonder.


IMG_5646.JPG

I found a couple articles months ago about using lichens and fungi as a dye source, you bet I was amazed. I found a couple good source books on what species are good dyes, and how the process varies from most other ways of natural dye. I have yet to experiment and get hands on learning with this new range of dye materials but I have begun to collect some.


Since lichens are such a slow growing organism, its widely considered unethical to collect lichens from trees and rocks where they are thriving. Its best to collect from fallen limbs. I’m thankful that the cherry trees in the backyard have many lichens growing on them, and a cherry tree being a cherry tree, they loose a lot of limbs every time the wind blows it seems. So I’ve been collectinf the fallen limbs for firewood, as I normally do, but taking the time to first harvest the lichens from them. Its a bit of work and I only get a small ammount of lichens at a time. 

Now, getting into the mushrooms is a different story. With mushrooms, you must always be careful to properly ID them before dyeing because if you use a poisonous species, then the yarn or fabric you dye could leech those toxins out onto the wearer. I’m taking my time to ID them and so far I havent found any that are considered good dyers.

I will, of course, keep you updated with my experiments! 

Natural Dyeing + Notes

IMG_5212.JPG

One thing I always tell folks who ask me about what books I’d recommend is keep your own book. While its great to have a resource, your own experience will be the greatest teacher when it comes to natural dyeing.  


IMG_4797.JPG

I keep a notebook where I write down every recipe for every dye bath I make, what time of day I pick the ingredients, how long I simmer or soak the yarn or materials, any little detail I can think of. I also keep a small sample of each dye bath, along with information on what kind of wool it is and how much wool got put in. 


IMG_5076.JPG

By keeping notes and samples, we’re able to build knowledge on how the dyes hold up over time, how the heat effects the take up of color, what specific mordants do to the color, ect. And since we’ve done the work ourselves, in our own enviroment with our own tools, we can easily try to recreate certain colors because we know what the factors where for those dyebaths we’re trying to recreate. 


IMG_5086.JPG

While note keeping and documenting doesnt change the fact natural dyeing is fickle by nature and you might never get the same color twice, it helps build confidence and knowlegde much better than a book of recipes from another dyer would. 

Spinning Wheel Restoration - Appalachian Made

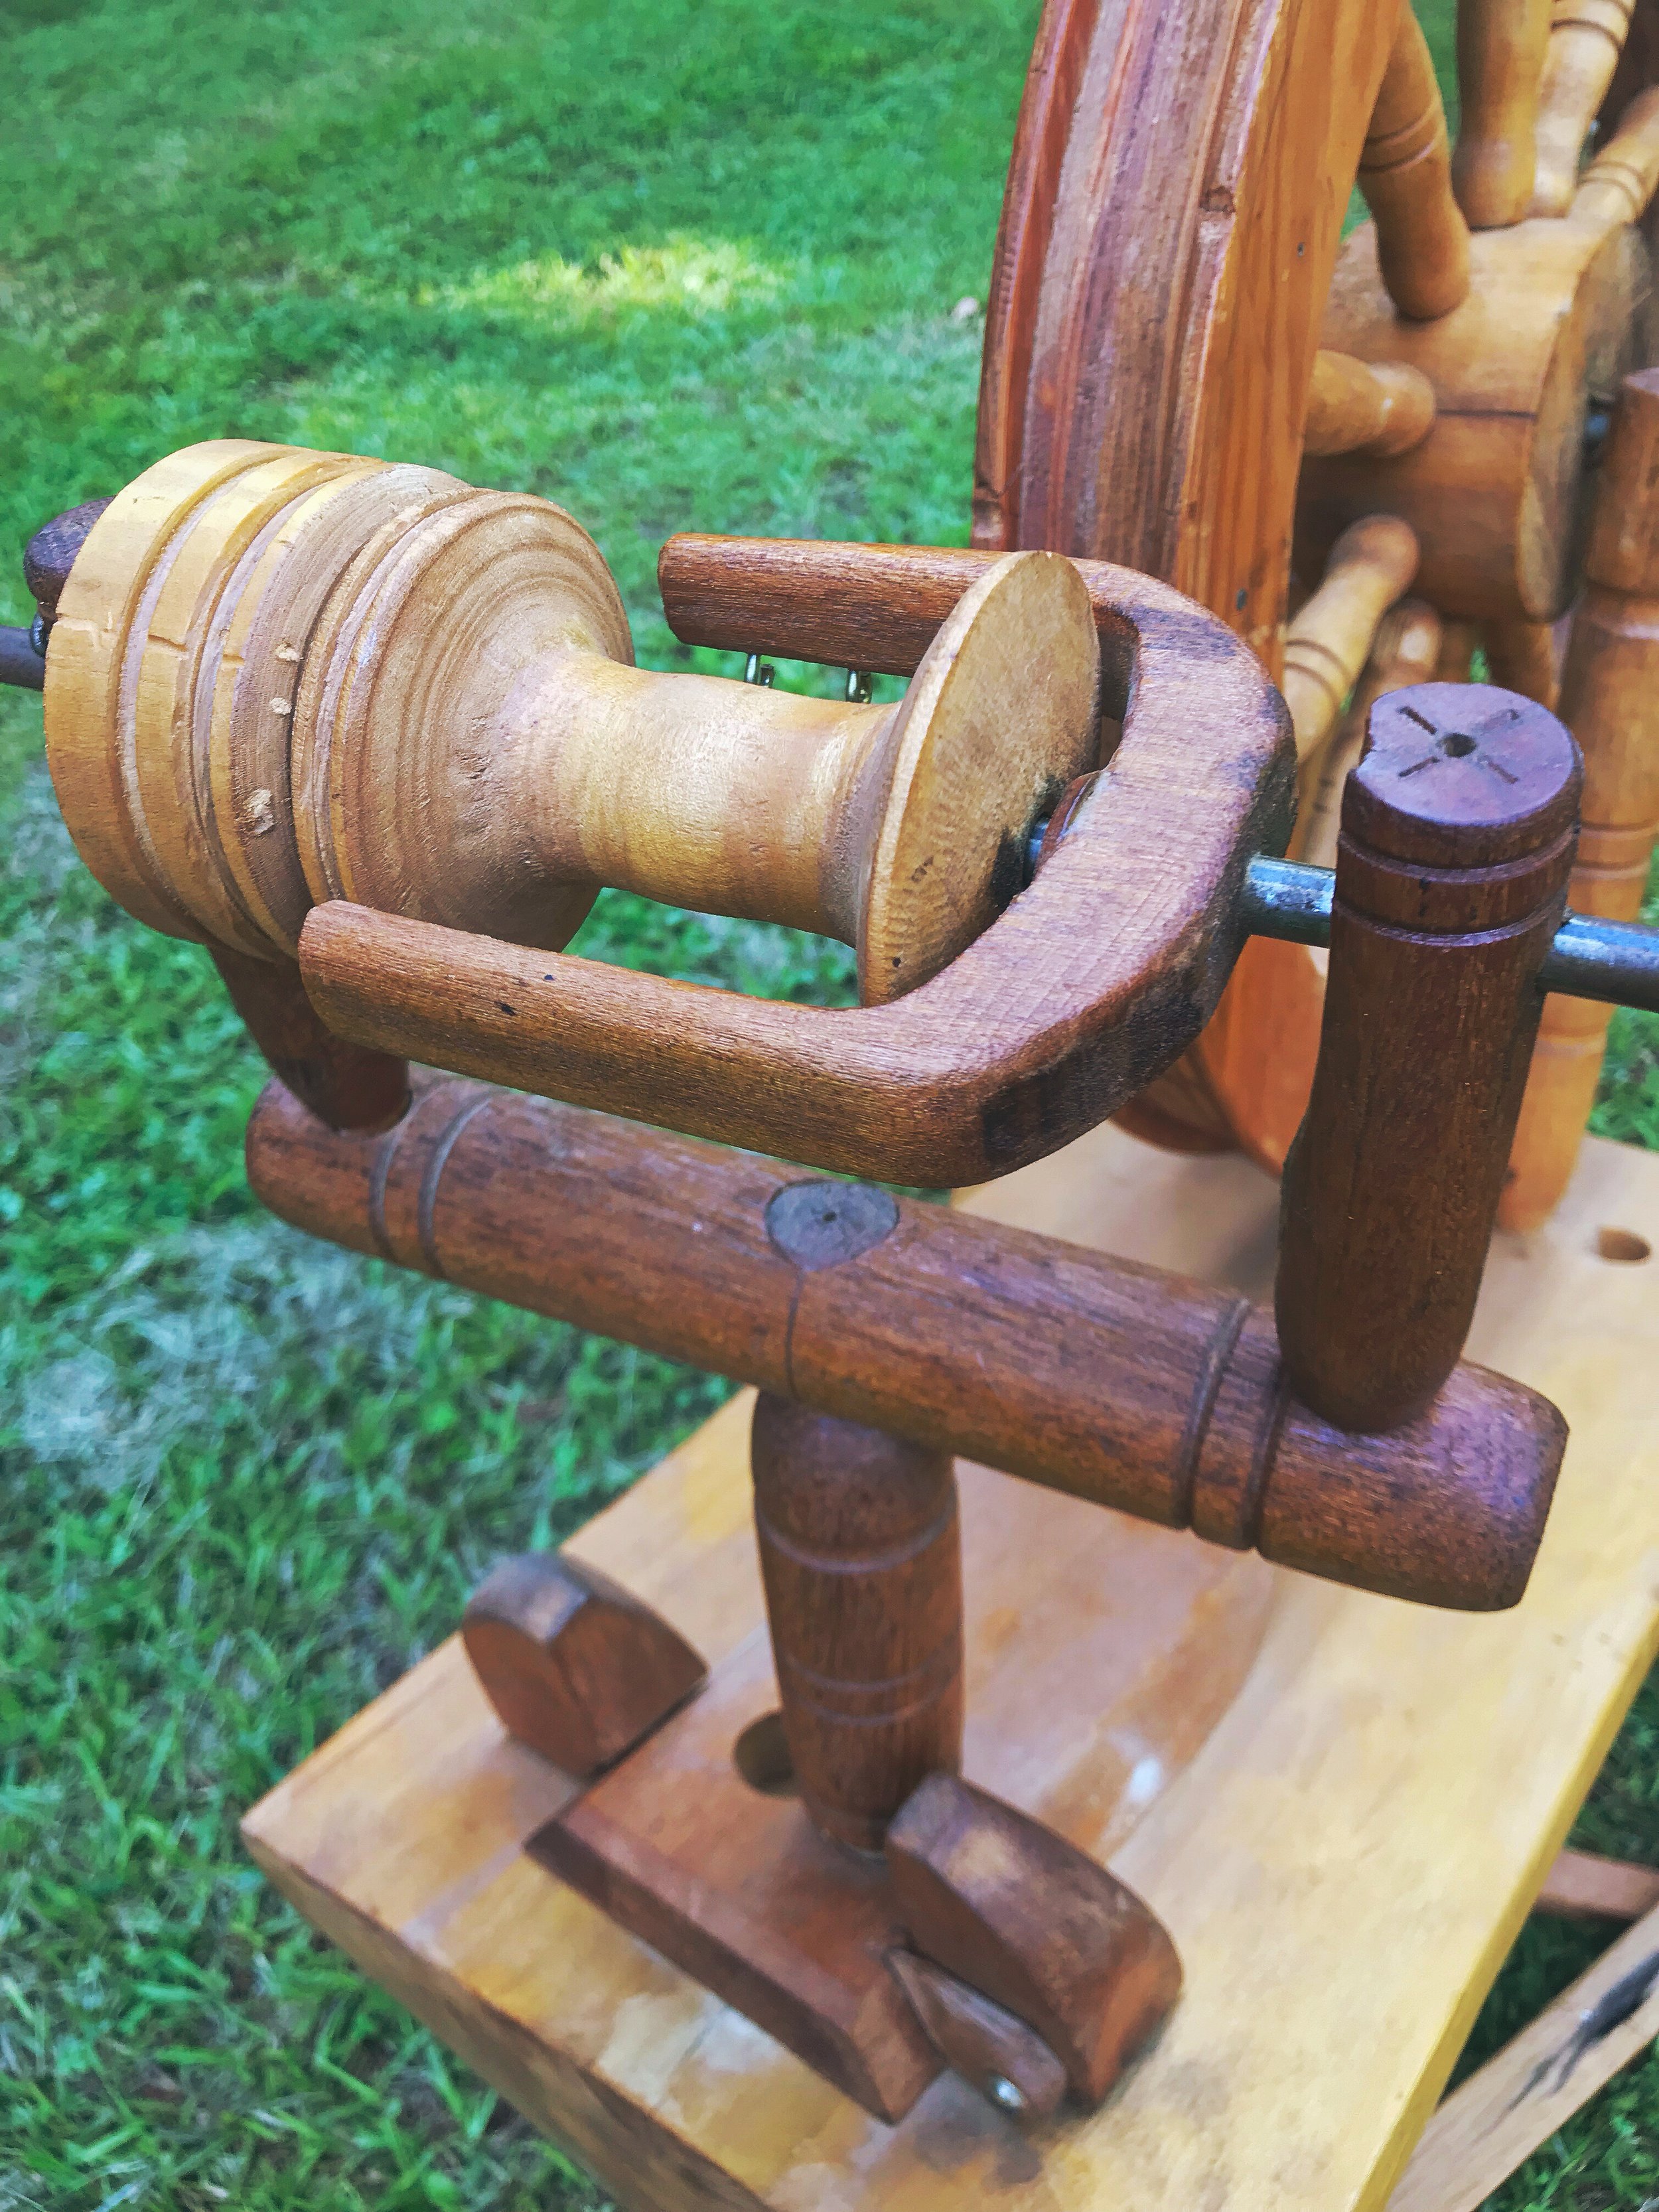
The other day I stumbled upon a listing for a vintage spinning wheel, a lady was cleaning out her antique booth and was trying to get rid of this clunky rustic spinning wheel. It caught my eye and after looking at it, I knew I had to get it and bring it back to its old glory. 


IMG_3972.JPG

Its missing a few things that have broke over time but looking at it closer, I realized everything was handcarved and handmade on it. The bench of it is half a log!  


IMG_3974.JPG

I could tell when I was looking at it to buy that this flyer was functional, for the most part I thought. I honestly figured since it was handmade then it wouldnt work like a normal flyer system. But I was wrong! I has a orficed in the metal rod, the flyer moves well, the bobbin does and its a double drive system.


IMG_4015.JPG

What I’ve come to learn about this wheel (and what has made my love for it grow) is where it comes from. You might notice, it looks like a log cabin decoration because its so rustic and simple. On the back side of the bench, the name “Oscar Cannon” is beat inro the wood, seemingly with a nail. 


IMG_3975.JPG

After some digging online and talking to another lady who has a wheel by Mr. Cannon, I’ve come to learn that he was a woodworker from Lumpkin County, Georiga. Which is super close to where my family comes from and I grew up. Oscar Cannon made everything from wood on his land, making fiddles and spinning wheels and more. So, I accidentally ended up buying a wheel that's a piece of North Georgia and Southern Appalachian history. Which is very near and dear to my heart.


I will share photos and videos of this beauty when I get her to spinning once again. I have some work to put into it (fixing the flyer, oiling and waxing the wood, fixing the treadle, fixing the footman, etc) but it’ll all be worth it.

Experiments with Iron

IMG_2338.JPG

Iron is both used as a mordant and modifier in natural dyeing. Typically as a mordant in  cellulose fibers and a modifier in protien fibers. Modifiers are chemicals that are used to alter (or modify) the chemical structure of the dye molecules thus changing the color outcome. In iron’s case, by dulling the colors and making them moodier. 

Some folks use iron in its powdered form (Ferrous sulfate) and some simple use old rusted nails. I chose to do the later, since we have some old rusty nails and bits and bobs laying around the homestead. 

After collecting a few handfuls of old rusty items, I lightly rinsed off any dirt then added to my solar dye baths of marigold, mullien, ox eye daisies and queen anne’s lace. All of these dyes typically give shades of yellow or cream. 


IMG_2336.JPG

Overnight the marigold dye bath turned black! So dark that I couldnt see much sunlight through the jar at all. And these are all in clear jars, by the way. After a few days the marigold flowers themselves turned black.  

The marigold + iron results on mohair/silk blend yarn.

The marigold + iron results on mohair/silk blend yarn.

I decided to dye some cotton fabric, bfl yarn and some mohair/silk yarn in marigolds. All premordanted, the yarns with alum and the cotton with soy milk. 

 The ox eye daisy bath was already exhausted by the time I added the iron, though, I didnt know. So, sadly, I haven no results to show for that dye bath. 

They mullien however did produce a light fawn brown, which surprised me because I expected a green from it as well.

The queen anne’s lace dye didnt dissapoint at all. I was able to get several shades of green from two different dye baths. One was about a pound of flowers, the other a quart of flowers. 

Queen annes lace results where typically similar to the marigold, first bath would yeild a deep green and the exhaust baths gave a nice sage green.

Queen Annes Lace dye bath #2

Queen Annes Lace dye bath #2

Madder  dyed then dipped in a Queen Anne’s Lace + Iron bath

Madder  dyed then dipped in a Queen Anne’s Lace + Iron bath

All in all, I love using iron. I’m able to acheive beautiful results every time. Though, I am biased as a lover of green. 

Various results from Queen Anne’s Lace + Marigold

Various results from Queen Anne’s Lace + Marigold

Summertime Solar Dyeing

Solar dyeing is my favorite way to dye in the sticky southern summer heat because standing over a roarin’ fire is not fun in summertime.

IMG_1480.JPG

Solar dyeing is where you use the heat of the sun to extract the dye from the plants. It can take several days to slowly draw out the dye, but it brings out beautiful colors, often different shades verse heating over a fire or stove top. 

This past few weeks I have collected purple bearded irises, ox eye daisies, sweetgum leaves, avocado peels and pits. As well as a leftover madder bath from the last time I dyed with madder.


IMG_1477.JPG

I often use my greenhouse for solar dyeing, using the empty space to help get a boost of solar heat. The jars often getting to 90-100 degrees Fahrenheit. I leave them out for several days until I feel that the dye has developed enough, then add in pre-mordanted yarn.   


IMG_1478.JPG
IMG_1481.JPG

Natural Dye Experiments: Onion Skins + Cochineal

IMG_9351.JPG

I recently met a local natural dyer with years of experience under her belt. I had the pleasure of spending a day dyeing with her! I watched her dye with daffodils, dandelions, cochineal and onion skins. She was kind enough give me two bags of onion skins, one left over from her dye bath and a bag of fresh unused skins. And a bit of cochineal “sludge” from her leftover dye bath. So I thought I’d document my first experience dyeing with them!

IMG_9258.JPG

Cochineal is the first nonbotanical dye I’ve used! Cochineal is a bug native to tropical and sub-tropical America, it feeds off cacti and the female bugs have a acid, called carminic acid, that form red and purple dyes. So its all natural! Just not botanical.

Cochineal dyebath cooling.

Cochineal dyebath cooling.

I first simmered the leftover skins in a bath and put in two 100g skiens mordanted with alum in and let them simmer for a bit. Probably about 20 minutes, but I wasnt counting. I let them stay in the bath while it cooled.

The result was very bright and almost a bit pumkiny despite the skins already being boiled and dyed with. I’m very impressed they had so much dye left in them!

The next bath I just added the fresh skins to the old bath and simmered for about 30 minutes. I put in one 100 g skien mordanted with alum, then two 100g skiens mordanted with alum then sat in an iron bath.

iron + onion skins.

iron + onion skins.


The iron skiens have to be my favorite yellow yet, that brassy yellow just makes my heart sing!

With the cochineal, I simmered it for 30 minutes and strained the bath. I then sat two 100g skiens in and simmered for 30-45 minutes. The result is this amazing rose pink shade.


All in all, I'd say it was a successful dye day, 6 beautiful skeins dyed in the beautiful early spring sunshine. 

First onion skin bath.

First onion skin bath.